My Portrait Process
I have read many books and magazines describing the process used to achieve a great painting, but at the end of the day it's what works for you.....
So what does work for me?
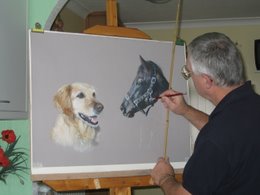
+copy.jpg) Above is a pastel portrait that I started a couple of days ago. First in the process was to transfer the picture onto my computer, I cropped, lightened & increased the contrast, then printed the image the size I wanted, sometimes this could mean splitting the image over two or three pages. When I'm happy with the results I use tracing paper to trace a basic outline of the image using a B grade graphite pencil. Then on the reverse side using either a white or brown pastel pencil I draw the image again following carefully the lines on the other side, the tracing is then taped onto the surface chosen for the finnished portrait, pastel side down, I carefully draw the image again this time using a harder graphite pencil H or H2 this will leave a light copy on the chosen surface. ( I find this method allows me to move the image around my paper trying different compositions. )
Above is a pastel portrait that I started a couple of days ago. First in the process was to transfer the picture onto my computer, I cropped, lightened & increased the contrast, then printed the image the size I wanted, sometimes this could mean splitting the image over two or three pages. When I'm happy with the results I use tracing paper to trace a basic outline of the image using a B grade graphite pencil. Then on the reverse side using either a white or brown pastel pencil I draw the image again following carefully the lines on the other side, the tracing is then taped onto the surface chosen for the finnished portrait, pastel side down, I carefully draw the image again this time using a harder graphite pencil H or H2 this will leave a light copy on the chosen surface. ( I find this method allows me to move the image around my paper trying different compositions. ) Is this cheating?....Not at all, even the great masters had their own ways of acheiving great paintings.
Jan Vermeer 1632 - 1675 who painted some lovely portraits including Girl with the Pearl Earing is reputed to have used a Camera Obscura to help in the process.